Uppercase and Lowercase N/n
Begin your uppercase N, by cutting a rectangle about 3″ by 6.″ Finger-press a 45-degree angle crease near the top, then sew on a strip, using the crease as a seam guideline. Ccut a 4″ square, cut in half diagonally, and stitch it onto the attached strip, as shown above. Press towards the dark (but you know this already).
Trim. I then stitched on the two side stems of the letter N, the left one a little wider than the right one.
Trim it up and you have an N.
Lowercase n–Version 1 (easier)
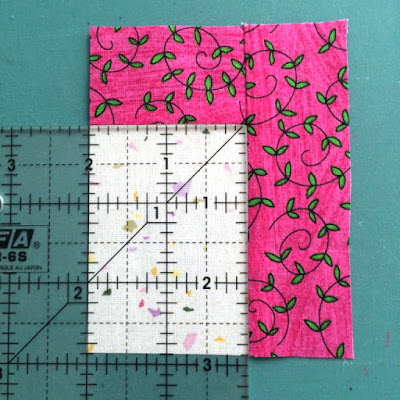
As per our usual, start with a glob of fabric in the middle. I laid the ruler over this one so you could see what mine was. The pink strips are cut 1- 1/2″ wide. Border the rectangle on two sides; I chose to do the top one first, but you could reverse it if you want.
Snowball on two upper corners. Then sew on the left-hand stem.
Since I was setting this into a word, I went ahead and added the top spacer.
Lowercase n–Version 2
I started this just like the lowercase m. In these photos, I used a 45-degree angle cut, but now I think a 30-degree angle would have been a better choice for this piece. This is what makes the n’s shoulder (refer to the typography terminology–it’s the part that goes horizontal on a lowercase n).
Two ways to get the trim: setting your ruler as above, or below.
Again, I think this angle is too steep. Flatten it out. I used the leftover triangle from the capitol N to finish off the upper inside piece of the lowercase n.
Trim and add on the two stems and the little snowball corner in the upper right and you are good to go. If you get stuck, check on the M page for more explicit instructions.
n is for needles and Nihondaira
Nihondaira, from here (No. 53)
This quilt uses yukata fabrics, sashiko stitching and outlining, and I learned these techniques from Roberta Horton, in a class I took in Houston at Quilt Festival. More photos can be found on my regular blog, OPQuilt.com


